Backfeeding 5G: Beating Bad Internet with VLANs
It’s been a while since I last wrote about anything vaguely network-related - well, that’s because everything’s been working fine. Until now, that is. Virgin Media decided that randomly going down for a couple of hours is a fine way to spice up their users’ otherwise boring lives. And when it’s up? Why not crank up latency to 500ms a few times an hour, just for laughs? Yeah, not great. Very, very annoying.
Normally, that wouldn’t be a huge problem since, back in the day, I had two ISPs (Internet Service Providers) running to my house - my regular Virgin Media and the wonderful Andrews & Arnold - the geeky ISP, built by geeks for geeks, which I used as a backup. I would gladly use it as my main ISP, but I’m not in a full-fibre coverage area, so at best, I’d get 75 Mbps, which is kinda… meh by today’s standards. But since I switched to an office-based job, I figured paying for two ISPs probably wasn’t worth it - until now.
The catch? I didn’t want to pay for a full-fat ISP contract. So, naturally, I started looking into mobile broadband as an option. Turns out, it is an option - just with a bunch of caveats.
Mobile Coverage
Overall, I have decent mobile coverage where I live:

Not the highest 5G speeds out there, but pretty damn good - better downloads than Virgin (547 Mbps down / 30 Mbps up, with ~13ms ping). But this only happens when I’m standing by the window facing the 5G mast (not exactly in line of sight, but pretty close). The situation changes dramatically once I go to the closet where most of my networking gear is stashed:

Yeah… not even funny anymore. Download speed dropped by a factor of 36x. So, I needed to put my 5G router somewhere close to that sweet spot by the window. Luckily, I have a cupboard there, with an Ethernet socket, and even when the cupboard is closed, things aren’t that bad - 395 Mbps down, 16 Mbps up, with ping in the high 30s. Unluckily, that cupboard also houses a few other things - switches, a mini-PC running my Blue Iris setup (which records my security cameras), plus a PoE (Power over Ethernet) switch for outdoor cameras.
The Problem
I had to use one Ethernet wire to connect all these devices to my main router - and that same wire had to carry the backup internet connection. Surely, there had to be a way to make this work, right? After consulting ChatGPT, I realized there was a way: using managed switches and VLANs (Virtual Local Area Networks) to separate traffic.
Unfortunately, this is where I hit the limits of my networking knowledge, and things got messy.
Troubleshooting VLANs
After misconfiguring everything a bunch of times, I got to a setup that should have worked. But instead, I ran into STP (Spanning Tree Protocol) loops, which basically shut down my entire network. Luckily, the wonderful folks at the Unifi forums came to the rescue and pointed me to a video of a guy doing pretty much the same thing with Comcast and Starlink.
After watching it a couple of times, I realized I almost had everything set up correctly. Of course, the fact that I thought I was using Port 1 on my main switch when I was actually using Port 2 didn’t help. Took me another half-hour to figure that out. But in the end, I got it working, so I figured I’d document it here for anyone who wants to replicate this setup but prefers a written guide over YouTube videos (seriously, give me a text manual any day - why is everything a video these days??).
But I digress.
The Setup
Above is a very simplified version of my home network (it only includes the two switches and leaves out WiFi, since it’s not relevant). The key idea was:
Step 1 - Create a New VLAN in Unifi
First, I created a VLAN in Unifi Network settings. The key here is to create it as a 3P VLAN (Third-Party VLAN), meaning Unifi assumes it exists and some other router is “powering” it:
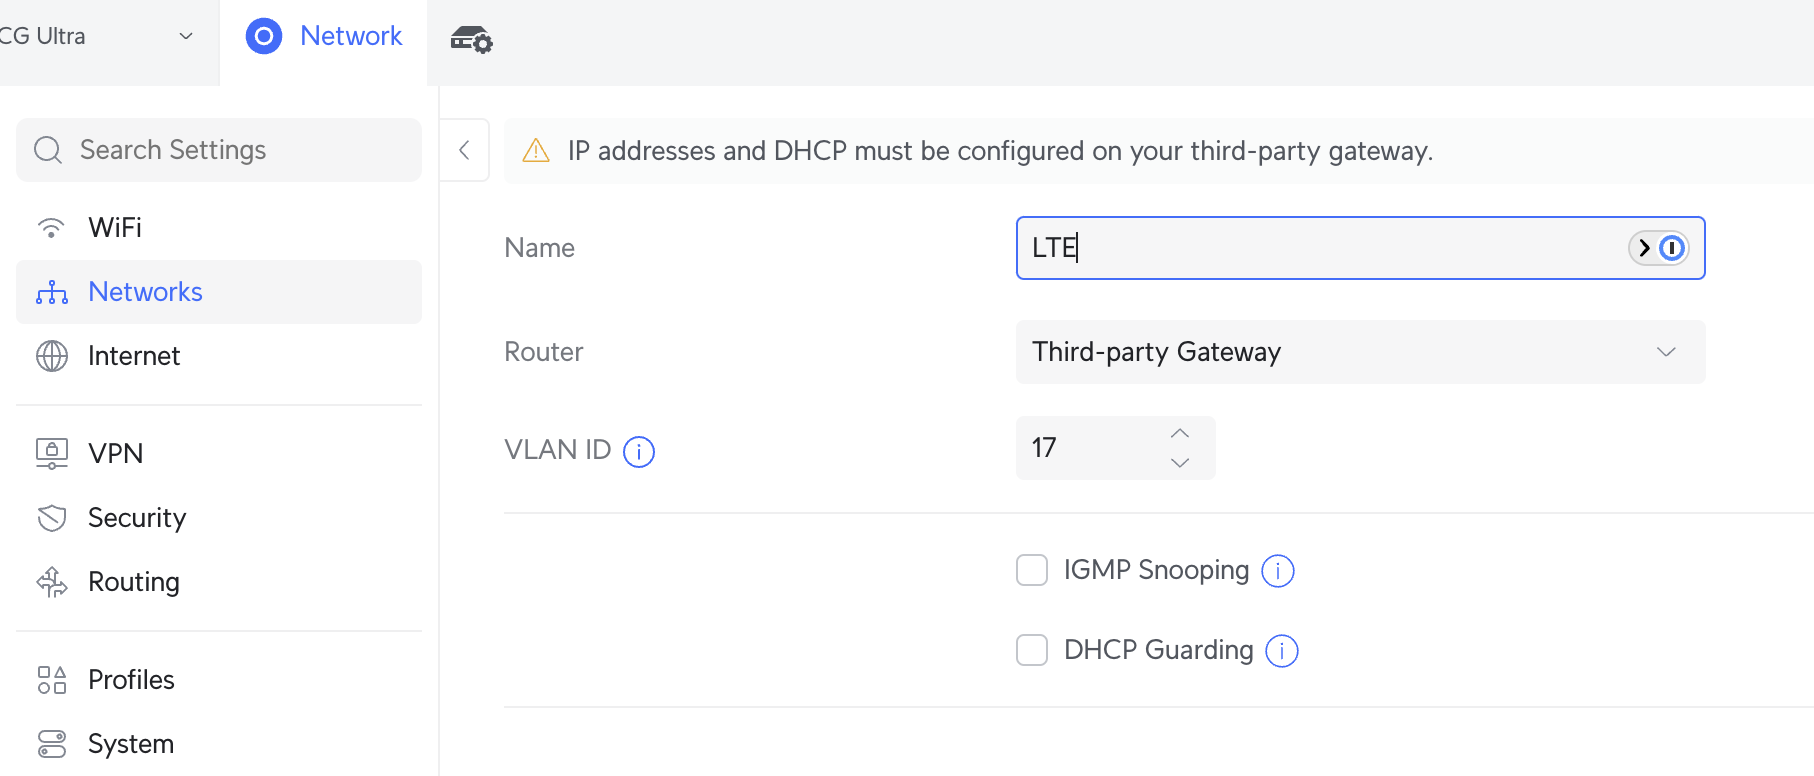
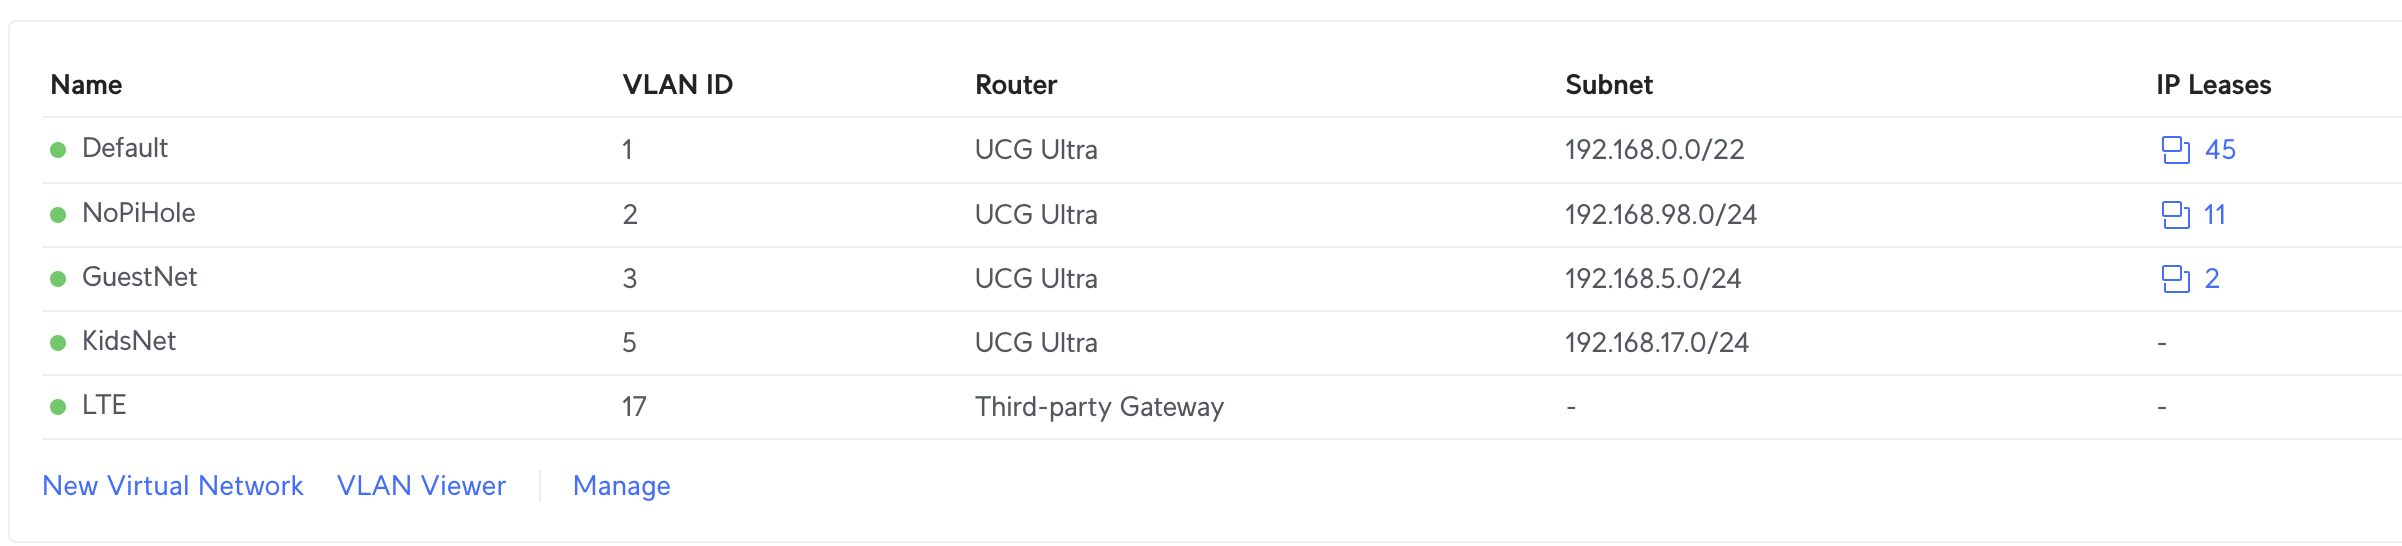
Here, I used VLAN ID 17 - but it can be anything, as long as it doesn’t clash with other VLAN IDs.
Step 2 - Assign VLANs to the Right Ports
Now, we need to make sure the VLAN is correctly assigned to the involved ports.
Rule of thumb:
- Ports that should carry only this VLAN → Set as Native VLAN and block all others.
- Ports that must pass through this VLAN → Set as Tagged VLAN.
Start with the switch where the 5G router is connected:
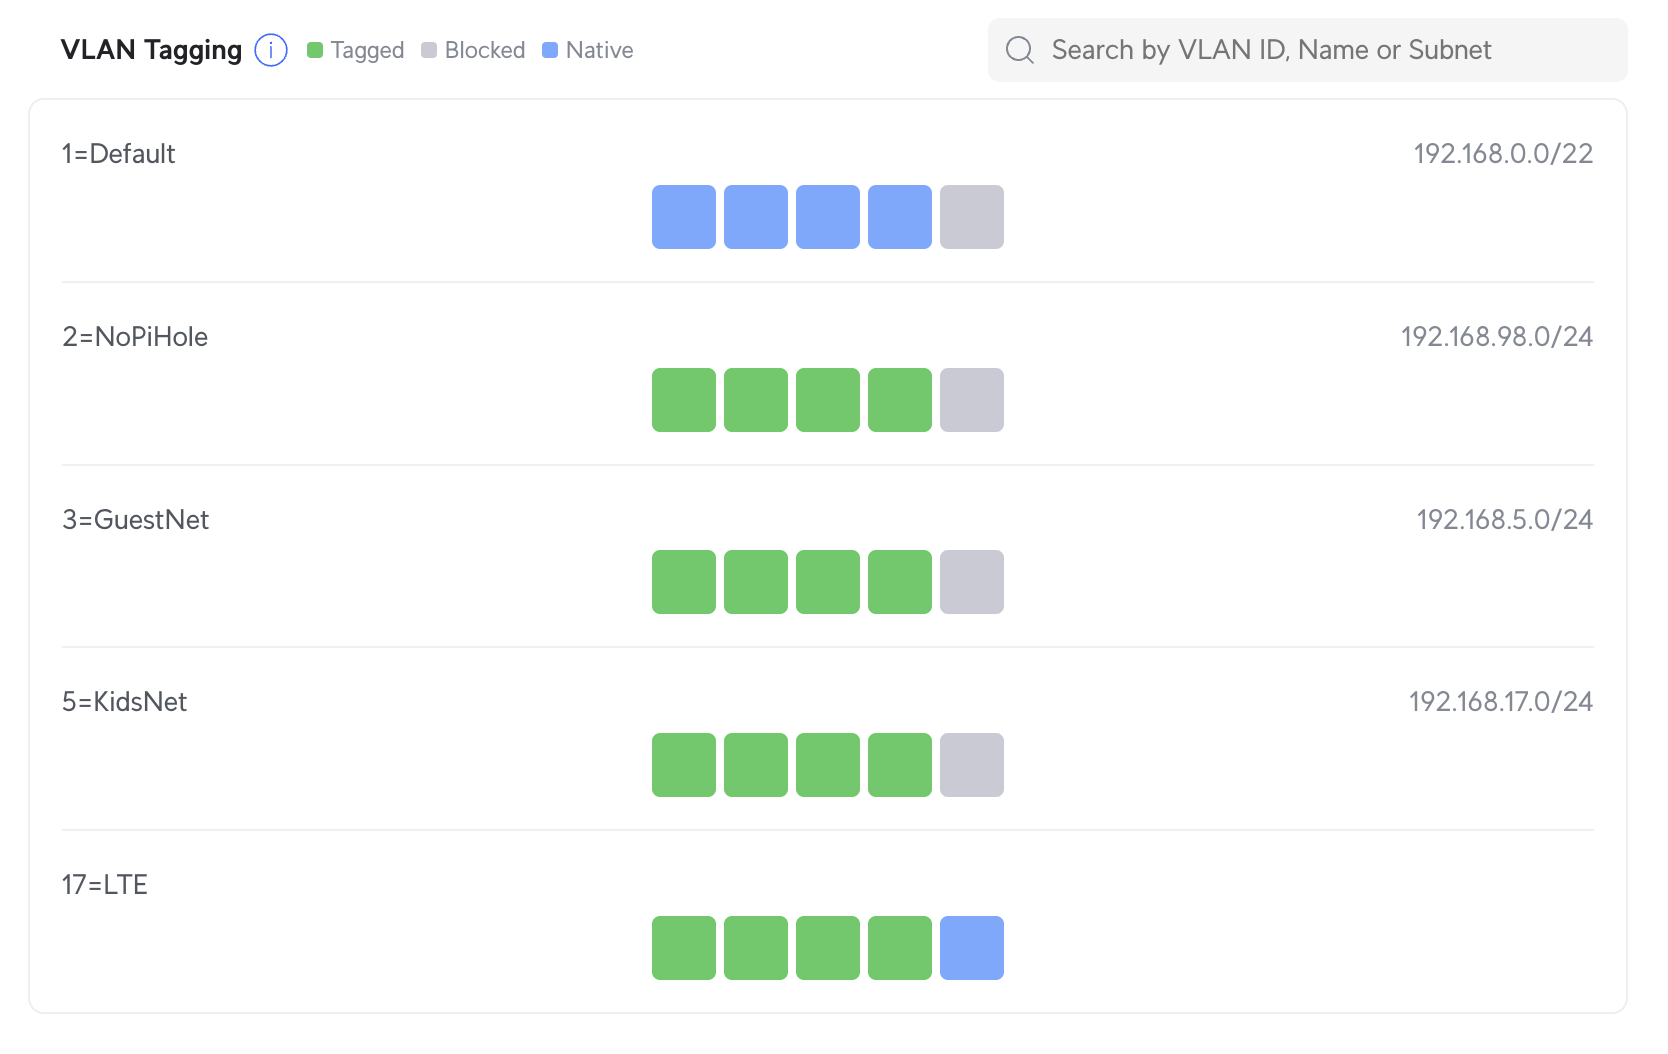
Here, Port 5 is set to VLAN 17 as native, and all other VLANs are blocked. On the main switch, things look slightly different:
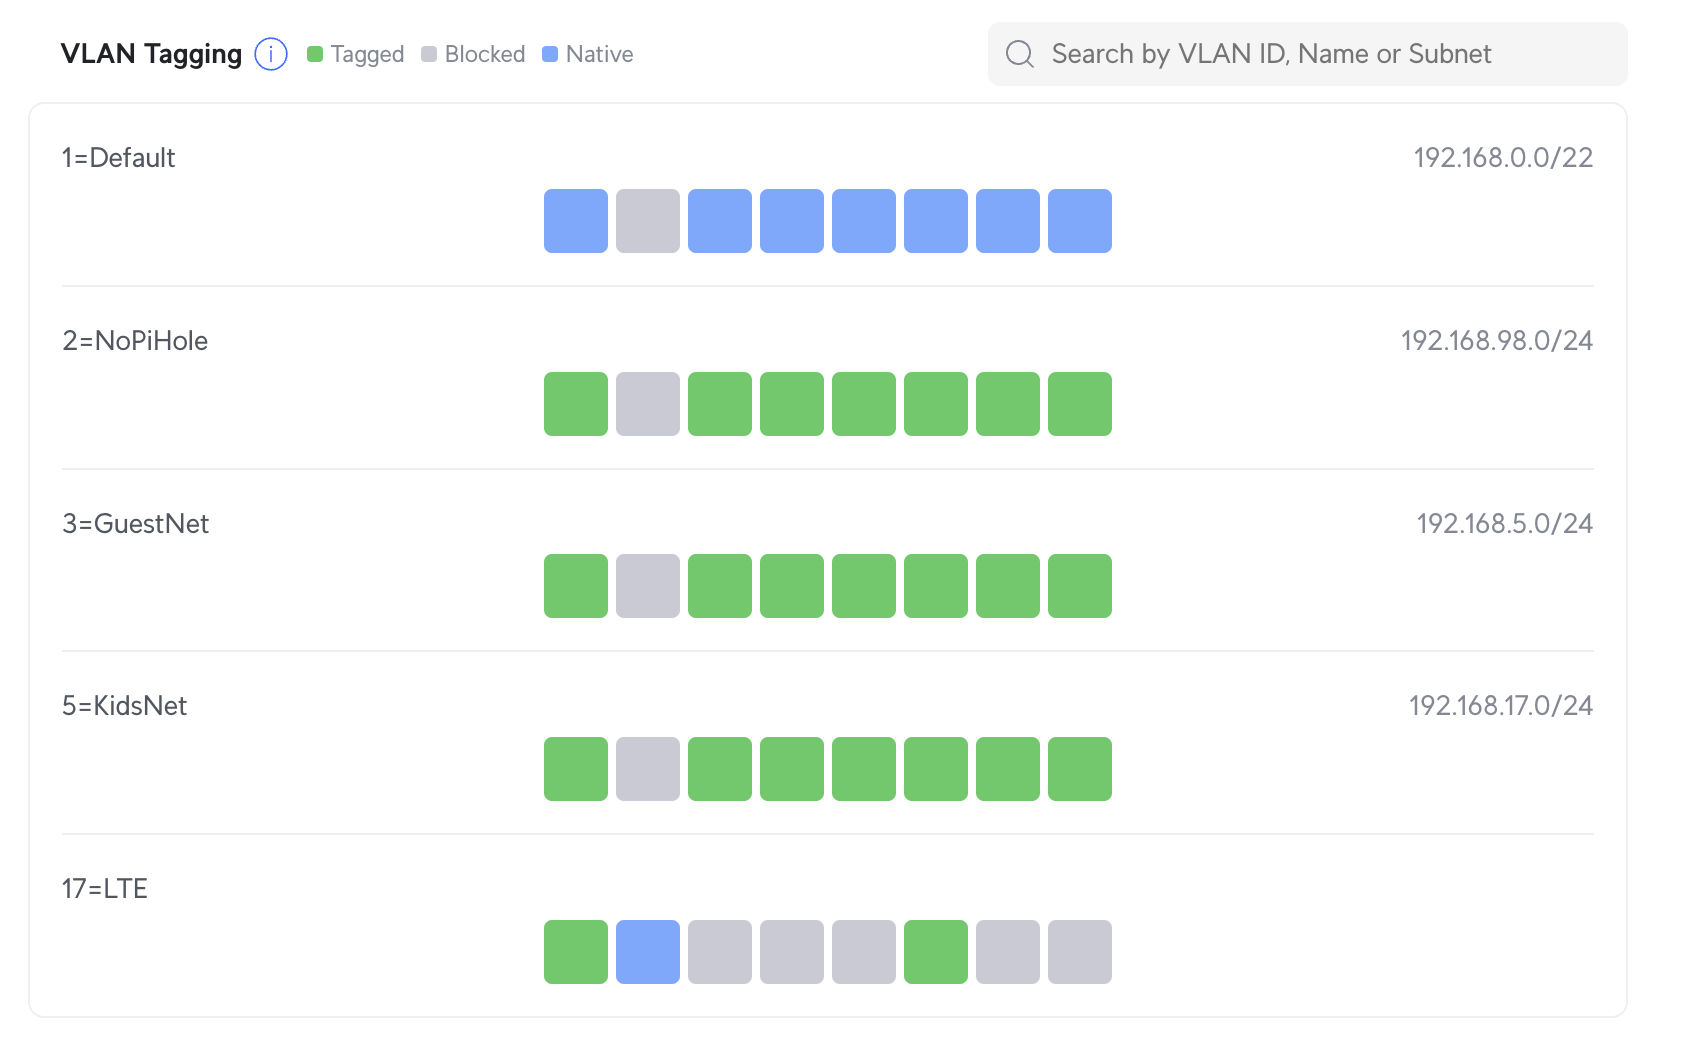
- Port 6 (which connects to the second switch) has VLAN 17 as tagged - so it passes the VLAN through.
- Port 2 (which connects to the Unifi router’s WAN2 port) has VLAN 17 as native and blocks all other VLANs.
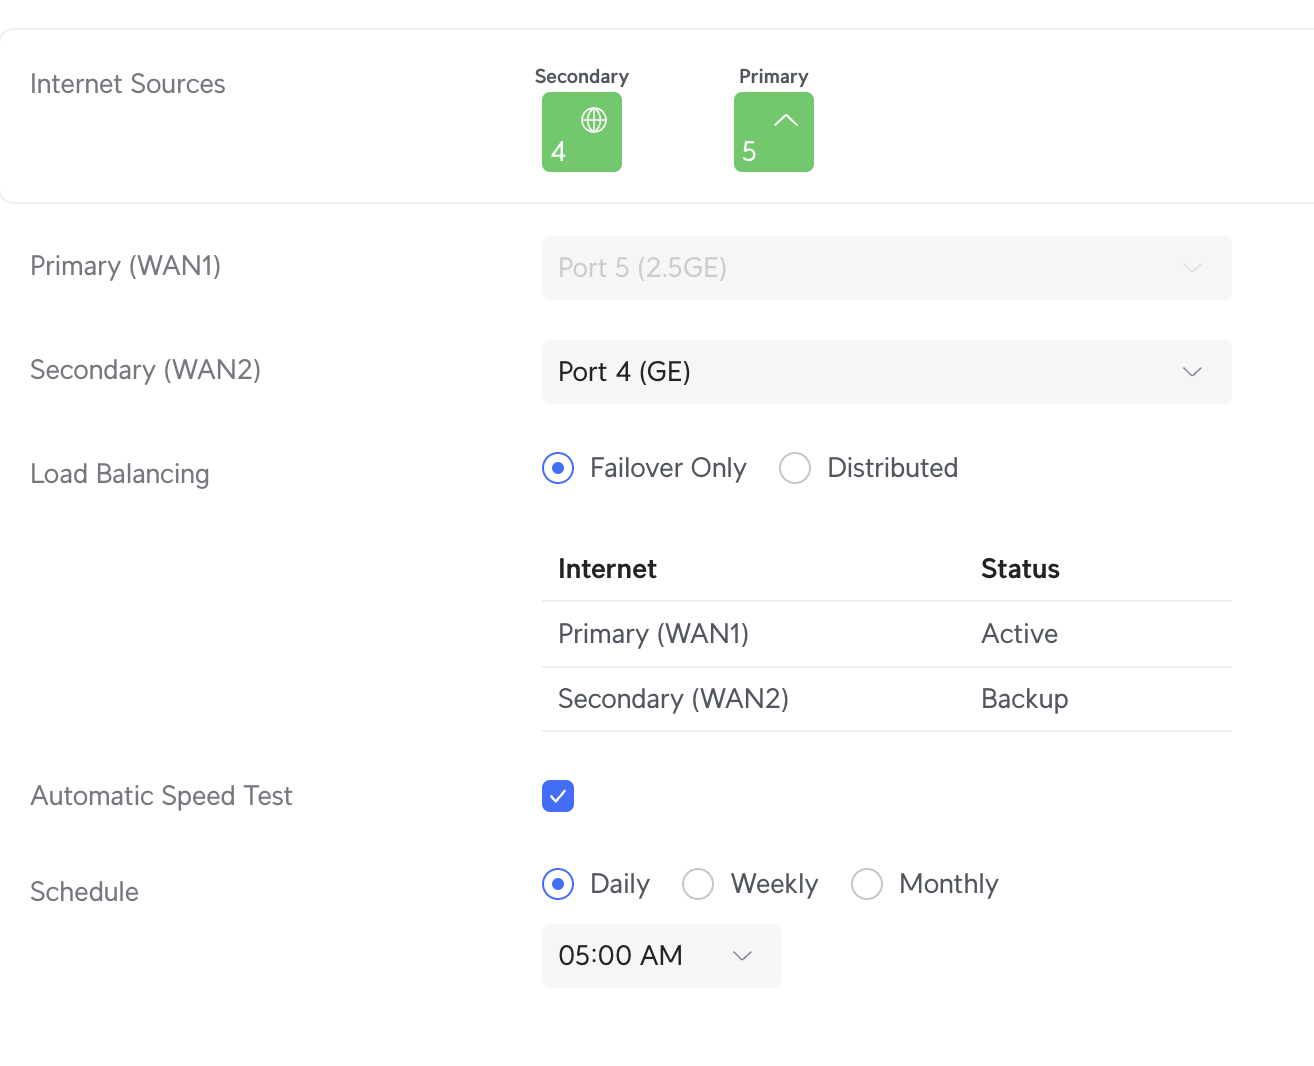
From there, Unifi makes it pretty straightforward to set up a distributed or failover profile for WAN2:
Bottom Line
Everything works now! And once you dig a bit deeper into how native vs. tagged VLANs work, it actually makes sense. Hopefully, this setup holds up for a while - at least until I come up with another crazy networking idea. 😁