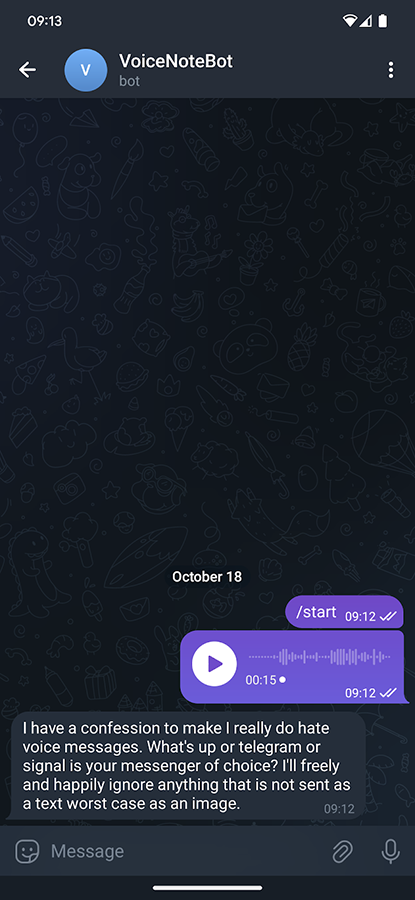
I have a confession to make: I really do hate voice messages. WhatsApp, or Telegram, or Signal is your messenger of choice - I’ll freely and happily ignore anything that is not sent as a text (worst case, as an image).
Or, I’d rather ignore it. Some friends and family just choose to continue sending me these voice messages and apparently are fully capable of holding a grudge when I am not reacting to them. This has finally reached an infliction point when I missed something I’d much rather didn’t - and I decied to take the matter in my hands.
Luckily, by now there are in abundance of speech recognition APIs, and some of them are clearly better than the others. Being a Google user and Android devotee, I know full well that as far as voice recognition goes, few and far in between can compare with Google’s models – and the fact that I am not constrained to on-device inference makes it all better.
Lo and behold, this is how voicememobot was born.
To use it, you will need a few things:
- Google Cloud API token with access to Speech API
- Telegram Bot token
- Docker host where you can run the image
First step is arguably the most involved - there are lots of buttons to click and links to follow. At the highest level, here’s what you gotta do:
1. Establishing Your Domain: The Google Cloud Project
- Start by heading to the Google Cloud Console. If you’re not signed in, the platform will prompt you to do so.
- Once in, click on the ‘Select a Project’ dropdown in the header. This will open a modal where you’ll find the enticing ‘NEW PROJECT’ button. Give it a click.
- In the form that appears, christen your project with a fitting name, and decide on its fate by selecting a billing account and location.
2. The Golden Ticket: Enabling Billing
- Ah, the world isn’t free, and neither are some of Google’s finest services (but as far as pricing goes, a few dollars a month can transcribe many, many text messages). Navigate to the left sidebar and select “Billing.”
- If you’ve already set up a billing account, great! If not, you’ll be prompted to set one up. Trust me, this is the gateway to a world of possibilities.
3. Unleashing the Power: Activating the Speech API
- On the left sidebar, search for and select “API & Services” > “Library.”
- In the vast library of APIs, you’ll find Google’s prized possession: the Cloud Speech-to-Text API. Once you’ve found it, click on it.
- Embrace the magic by clicking “ENABLE.”
4. Crafting the Elixir: Configuring the Speech Recognizer
- Within the Cloud Speech-to-Text API realm, locate and select “Speech Recognizers” from the left panel.
- You’ll find an inviting option labeled “Create.” Give it a gentle click.
- A form will unfurl before you. In the “Name” field, christen your recognizer as “my_speech_recognizer”.
- Make sure that the recognizer is selected as “global”
5. The Essence of Voice: Setting the Recognizer’s Properties**
- In the “Language” section, select the sophisticated “en-GB” from the dropdown. I am using a combination of “en-GB” and “ru-RU”, and API handles it just fine, you can choose your own favourite locales from the dropdown list.
- Delve deeper into the “Model” section and opt for the “long” model. This model possesses the patience to handle longer durations of speech.
- Lastly, in the “Features” segment, ensure you tick the box labeled “Enable Automatic Punctuation.” This will ensure your transcriptions are not only accurate but eloquently punctuated.
6. Your Secret Key: Generating a Service Account API Key
- Back on the left sidebar, under “API & Services”, choose “Credentials.”
- Click on “Create Credentials” and select “Service account.”
- Give your service account a name that you’ll remember, and grant it the necessary permissions.
- Once created, you’ll have the option to download a JSON key for this service account. This is your golden key, handle it with care!
Right, you think you are done with Google Cloud? Kinda, but if you leave it as
is, you will only be able to transcribe messages of up to 60 seconds - and as my
luck goes, many of them tend to be a lot, a lot longer than that. To access
longer transcriptions Google Speech API mandates you to use batch mode, where
you upload the file to Google Cloud Storage, ask API to transcribe it and then
patiently wait for the results, polling it every now and then (maybe there’s a
cloud pub/sub version? I didn’t dig into that). Anyhow, go to Cloud Storage
(you can press / on your keyboard for search menu to dutyfully open) and
navigate to Buckets on the left (note, that you may need to enable Cloud Storage
first - but this should be no different from enabling the Speech API). Click
“Create” and give your bucket an appropriate name - this is where the files will
be temporarily stored for transcription only (they are deleted afterwards to
preserve your storage quota). Remember that name - you’ll need it later.
Now you have the Cloud set up, and the API key - next step, Telegram bot. I mean, I could’ve totally chosen to build my own web UI, but honestly given all of this will be happening in messenger apps, bot felt like an easier choice.
1. Venturing into the Bot Realm: Beginning Your Telegram Bot Journey
- Launch your Telegram app and head straight to the search bar. Type in “@BotFather” - yes, the legendary overseer of all Telegram bots.
- Strike up a conversation with him by sending “/start”. You’ll be greeted with a list of commands, each one more intriguing than the last.
2. The Birth of Your Bot: Creating Your Very Own Telegram Bot
- To initiate the creation ritual, send the command “/newbot” to BotFather.
- BotFather, in all his wisdom, will then prompt you to name your bot. Given our interests in voice recognition, perhaps something like “VoiceWizardBot” or “EchoScribeBot” might tickle your fancy.
- Once your bot’s name is approved, BotFather will ask for a username. This username must end in ‘bot’, like “voicewizard_bot” or “echoscribe_bot”.
3. The Key to Power: Your Telegram Bot Token
- Upon the successful creation of your bot, BotFather will bestow upon you a unique API token. This token is the essence of your bot’s identity and its conduit to the digital world. Guard it with your life, or at least, keep it safe.
You don’t need to set up any commands - there will be one and only one implicit command which you launch by sending the bot an audio message or an audio file.
Wow, that was a lot of work. Grab a coffee, you deserved it. Now for the easy
part: checkout the project and copy key.json you created in Google Cloud step
to the app directory. Next, create a file named config.yaml and punch in
vaguely the following:
telegram_bot_token: "<insert-your-telegram-bot-api-key-here>"
google_speech_api_key: "<name of your api key json file>"
google_speech_project_id: "<name of your Google Cloud project>"
google_speech_recognizer_name: "<your-speech-recognizer-name>"
google_storage_bucket: "<your-cloud-storage-bucket>"
usernames:
  - list_of_users
  - you_allow_to_use_bot
Almost done. At last, quickly verify that the config.yaml and key.json you
created have the same names as in docker-compose.yaml - if they don’t correct
them either here or there. You are ready to go!
docker compose up
If you did everything correctly, you will be greeted by something like:
[sgzmd@Roman:code/voicesummary]$ docker compose up
[+] Running 5/5
 ✔ voicememobot 4 layers [⣿⣿⣿⣿]      0B/0B      Pulled     4.4s
   ✔ 96526aa774ef Already exists                            0.0s
   ✔ 89756306e2dd Pull complete                             1.8s
   ✔ 4f4fb700ef54 Pull complete                             0.4s
   ✔ f42738a23e37 Pull complete                             0.8s
[+] Building 0.0s (0/0)                                      docker:default
[+] Running 2/2
 ✔ Network voicesummary_default  Created                    0.0s
 ✔ Container voicememobot        Created                    0.5s
Attaching to voicememobot
voicememobot  | 2023/10/18 08:49:24 Running app version development
voicememobot  | 2023/10/18 08:49:24 Authorized on account voicememo_bot
Go on, send you bot a voice message - for once, it’s not a cardinal sin anymore!