In the previous blogpost we discussed how to configure PCI passthrough on Proxmox; presuming you’ve done it, it’s now the time to configure graphically accelerated remote access, so on we go!
When you boot your instance with PCI-E card available you will immediately notice two things:
lspciconfirms that you have your graphics card available in the system, and …- the graphics is not better than what it was.
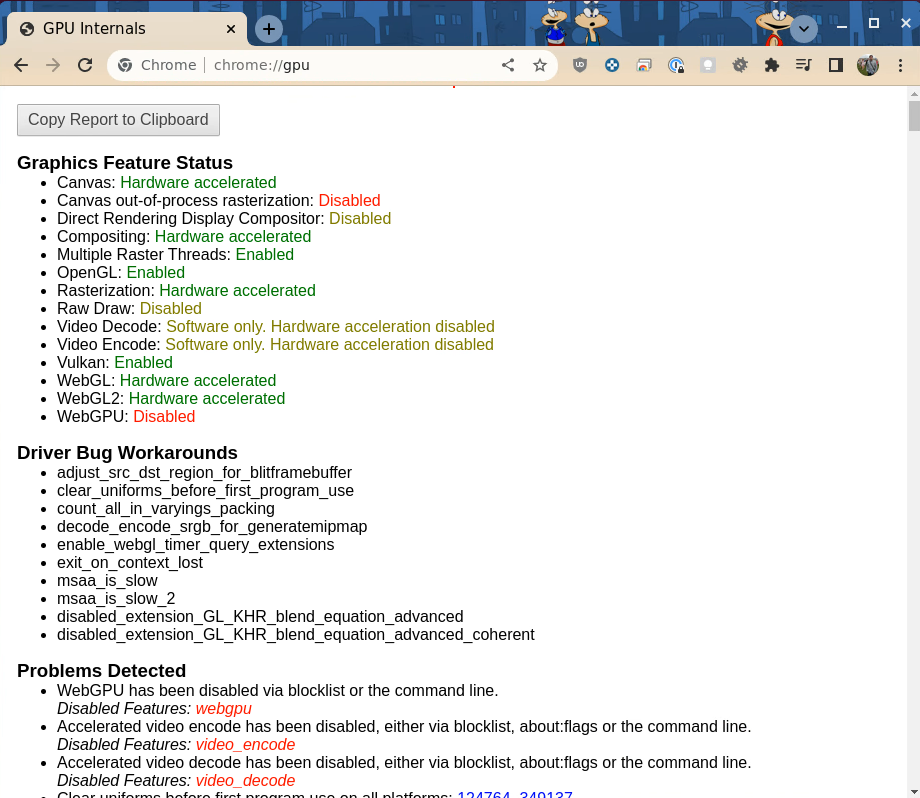
In fact, if you launch Chrome and navigate to chrome://gpu you will see that hardware acceleration is disabled, and trying to spin up, e.g. a YouTube video will send your fans spinning like nobody’s business with an animation more akin to that of a step-by-step strategy (hello fellow Civilization fans!). But we’ll fix it.
First of all, you will need to install proper drivers for your GPU. In my case, this would be Intel’s drivers, and this process is .. a little bit involved.
This Intel
page
gives an excellent step-by-step, but be vary, that it is likely to work only for
the version of Ubuntu it is written for (22.04). On top of that, it suggests
that you install Kernel 5.17.0 - which may be older than what you already have
(check with uname -a); if that’s the case, there will (hopefully) be updated
manual on that website.
Once you went through all of the steps, you’ll be able to confirm that OpenGL acceleration is enabled - yay!
  sudo apt-get install mesa-utils
  glxinfo | grep OpenGL
At this point, you can verify that GPU acceleration is working by firing up the same chrome://gpu page:
Until now, I’m presuming, you’ve been using Proxmox’ built-in VNC client to interact with the desktop - which is suboptimal, to say the least. Time to fix it. Here we’ll be using Google’s Chrome Remote Desktop (which, among other things, has a notable advantage of traversing NAT and not requiring a VPN if you are trying to connect to your box remotely).
Start with installing Chrome Remote Desktop on your instance:
  wget https://dl.google.com/linux/direct/chrome-remote-desktop_current_amd64.deb
  sudo apt-get install --assume-yes ./chrome-remote-desktop_current_amd64.deb
To finish the installation, on your local computer navigate to https://remotedesktop.google.com/headless and follow the instructions for setting up other computer (skip the download and install the .deb part). You will get to the stage where for Debian it’ll suggest you to run something like:
# DO NOT USE THIS SNIPPET
DISPLAY= /opt/google/chrome-remote-desktop/start-host \
  --code="long-code-goes here" \
  --redirect-url="https://remotedesktop.google.com/_/oauthredirect" --name=$(hostname)
Copy that snippet from Chrome Remote Desktop’s website and run in your terminal
(or use SSH). Set up a PIN and (again, on your local computer) navigate to
https://remotedesktop.google.com - if
everything worked well, you should see your newly created instance, named same
as the $HOSTNAME on your remote VM. If you sign in, you’ll notice that UI is
very snappy, windows render quickly and in general overall experience is very
pleasant.
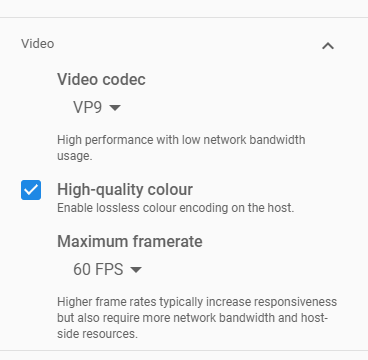
If you want, you can click a little arrow button in the middle of the right edge of the screen, and change CRD settings to make things even smoother (albeit at a cost of bandwidth and remote CPU load):
This is it - you are now done, enjoy your new VM workstation!